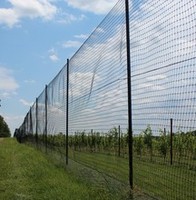
How to Install Your Deer Fence
 If you’ve never installed a deer fence before, we know it may seem a
little intimidating. However, it’s actually pretty easy. Just follow the
steps we’ve written out from our deer fence installation video:
Installing Your End System
1. Using a post hole digger, dig a hole that’s about 3 feet deep.
2. Place your end post in the hole and make sure that it’s straight.
3. Fill in the hole with either dirt or quick-drying concrete (if the fence is a permanent fixture).
4. If you’re using a 7 1/2-foot or 8-foot fence, install your post extensions.
5. Measure and mark 12 inches from the top of the end post, then place the brace band at that mark.
6. Place the brace cup in the band and position it so that the brace post will be just inside the fence line and secure the cup. (If you’re installing a corner system, you’ll need two brace cups.)
7. Place your next post in the brace cup at a 45-degree angle and dig a hole (about a foot deep) where the end of the post meets the ground.
8. Cement the post in place or use a dead man and fill the hole back up with dirt.
(If you’re installing a corner system, repeat steps 5-8.)
9. Repeat this process for the other end of your deer fence.
Installing Your Tensioning System
1. Feed the end of your monofilament wire through one side of your connection sleeve, then loop the wire around the post and loop it through the other end of the sleeve.
2. Push the sleeve as close to the bottom of the post and as close to the post as possible, then crimp.
3. To make the wire more secure, criss-cross self-locking ties around the wire and trim.
4. Roll the wire to the other end of your fence, pull it as taut as possible, and repeat steps 1-3.
Installing Your Posts
1. Measure the length of your deer fence and divide it by the number of posts you have to figure out where to place each post.
2. To install angled steel posts: Place the post where you want it and then slip the spring-loaded post driver over the top of the post. Grasp the handles and use powerful vertical movements to push the post into the ground.
2. To install heavy duty posts: Place your post sleeve where you want your post and drive the sleeve into the ground using a drive cap and hammer. Then, place your post in the sleeve.
Installing Your Fencing
1. Have one person unroll a portion of the fence while the other person secures it with self-locking ties every 5-6 inches on the post. (Keep the fencing rolled up and unroll as you go along to keep it as tight as possible.)
2. Repeat step 1 until you reach the full length of your deer fence.
3. Once the fence is complete, attach the top of it to your monofilament wire using hog rings and the hog ringer tool to keep the fence from sagging.
4. Secure the fence to the ground with ground stakes. Place them every 5 feet along the fence line.
5. Attach warning banners about every 5 feet and half-way up your fence to warn the deer that the fence is there.
If you have any questions, don’t hesitate to call our deer fence experts. We’d be happy to help!
